

How To Install Bmx Stem
This article covers the full procedure of how to supervene upon threadless stems, including choosing uniform components, proper spacer orientation, and final centering and headset adjustment.
ane
Getting Started
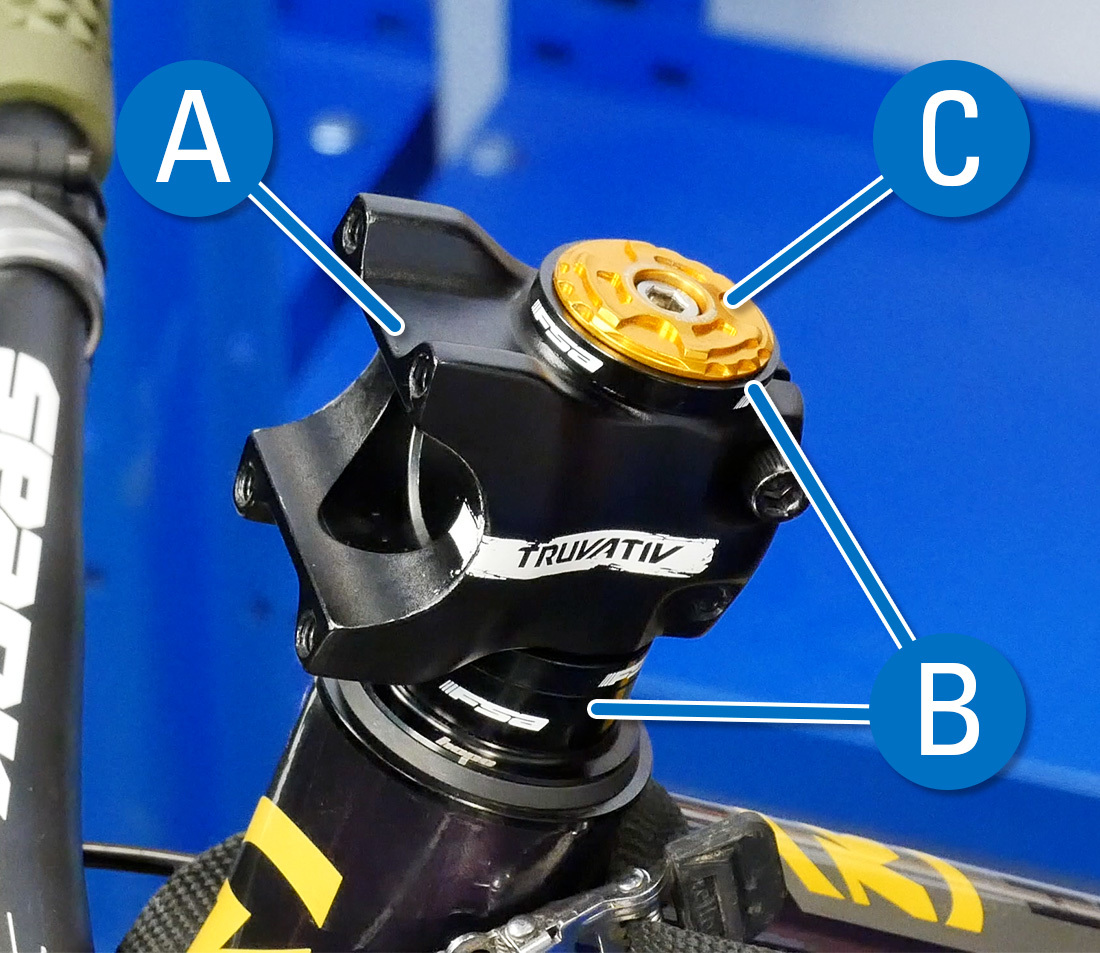
A "threadless" stem refers to a system where a fork with a not-threaded steerer tube extends through the head tube. A stem (A) so clamps effectually the outside of the steerer tube along with spacers (B) if necessary. Finally, a top cap (C) keeps everything in place and acts as a headset adjustment.
Many older bikes and some lower-finish bikes take threaded steerer tubes. The stems used with these systems are referred to as "quill stems". For more information, see Stem Removal & Installation: Quill Stems
Threadless stems will typically take i–3 pinch bolts (D) used in conjunction with a pinch slot (Due east) to hold the stem to the steerer tube. They will also have 2–6 bolts (F) securing the faceplate (G), although in some cases they hook on with one side and bolt on with the other.
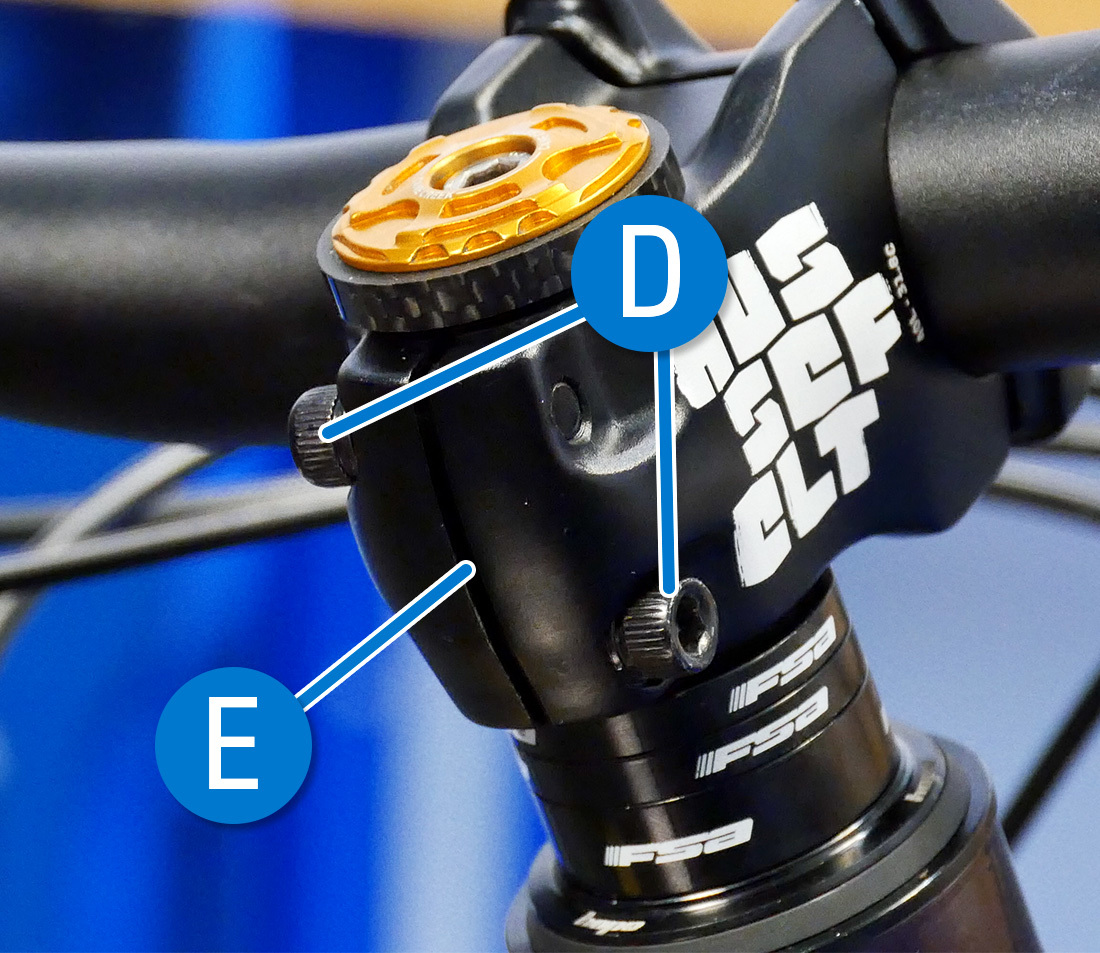
Pinch bolts (D) and Pinch Slot (E)
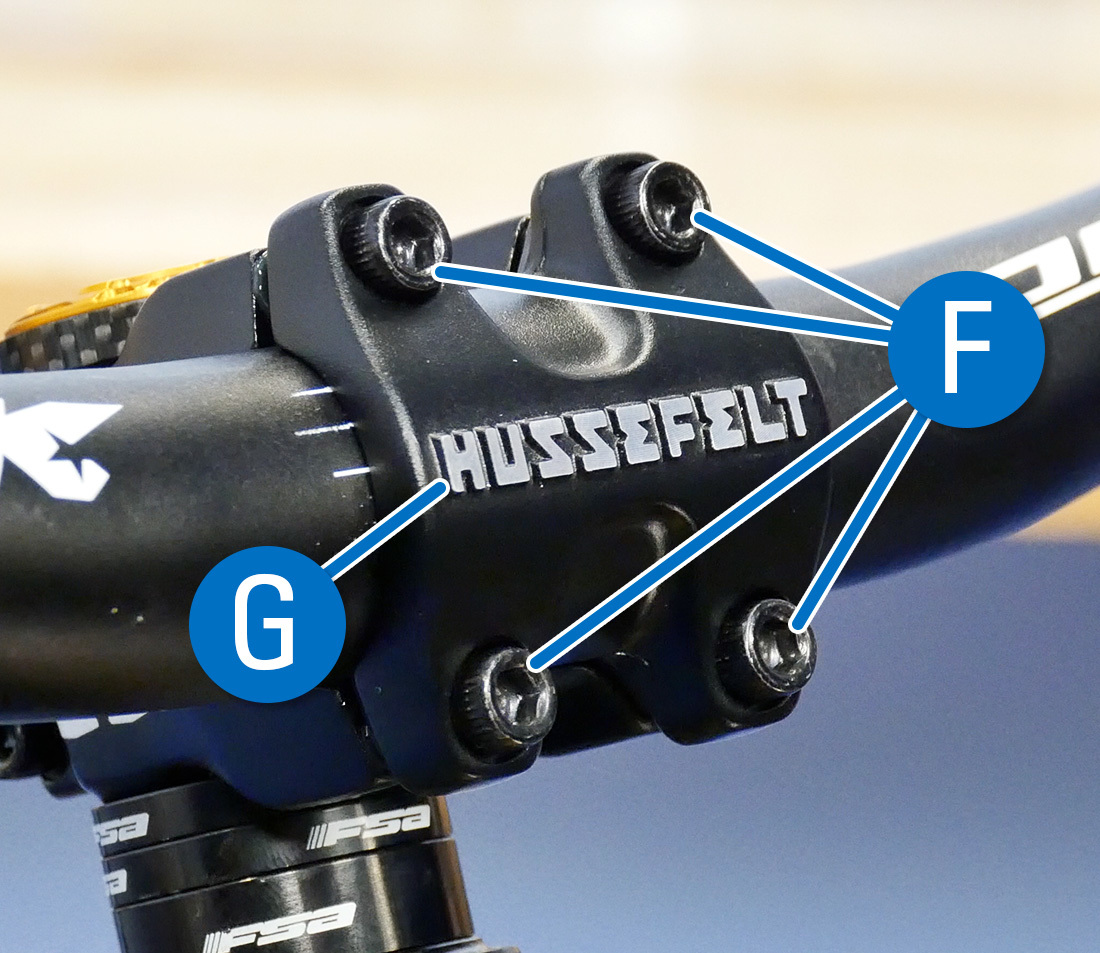
Faceplate Bolts (F) and Faceplate (Thou)
Stems come in dissimilar steerer tube and handlebar sizes. It is wise to mensurate your components to ensure that you are installing or ordering the correct stem. Some common handlebar diameters are 22.2, 25.4, 26.0, 31.8, and 35mm. At that place are some outliers on some older bikes. Mutual steertube diameters are ane″, 1 ⅛", 1 ¼" and 1 ½".
To decide the diameters of the steerer tube and bar, measure right where the stem will clamp using a metric caliper. Be sure to be accurate as some clamp diameters are within fractions of a millimeter of each other and are not cross-compatible.
It is hard to determine the clamp diameter of the stem by measuring it. The clamp diameter is typically engraved or labeled on the stem, simply sometimes it is non. Incompatible components can be a safety risk, so always double-check with the manufacturer for specifications and compatibility data.

Measure the eye of the bar
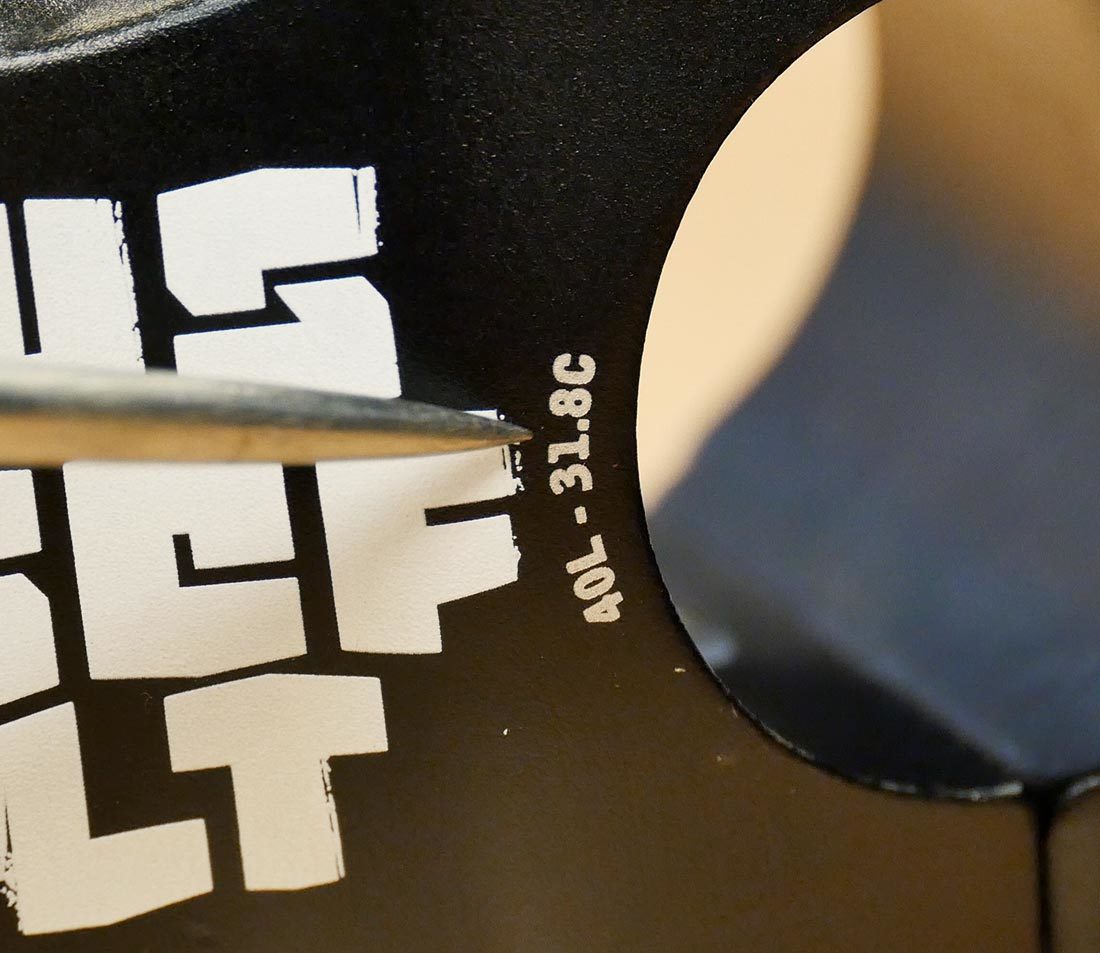
Stem size is oftentimes labeled on the stalk
Stems also come in different lengths — measured from the center of the steerer tube to the bar center — and angles — typically between 0 and 20 degrees. These measurements are generally marked somewhere on the stem or its packaging. Stems can be installed in an up or down position to conform the bar height without changing spacer orientation. This is often referred to every bit positive and negative ascent. When making desperate changes to the angle or length of the stalk, changes to housing length may be required.
Stems are unremarkably accompanied on the steerer tube by spacers. These spacers come in a multitude of different thicknesses, colors, and materials. They allow for height aligning, and they also play a part in headset adjustment.
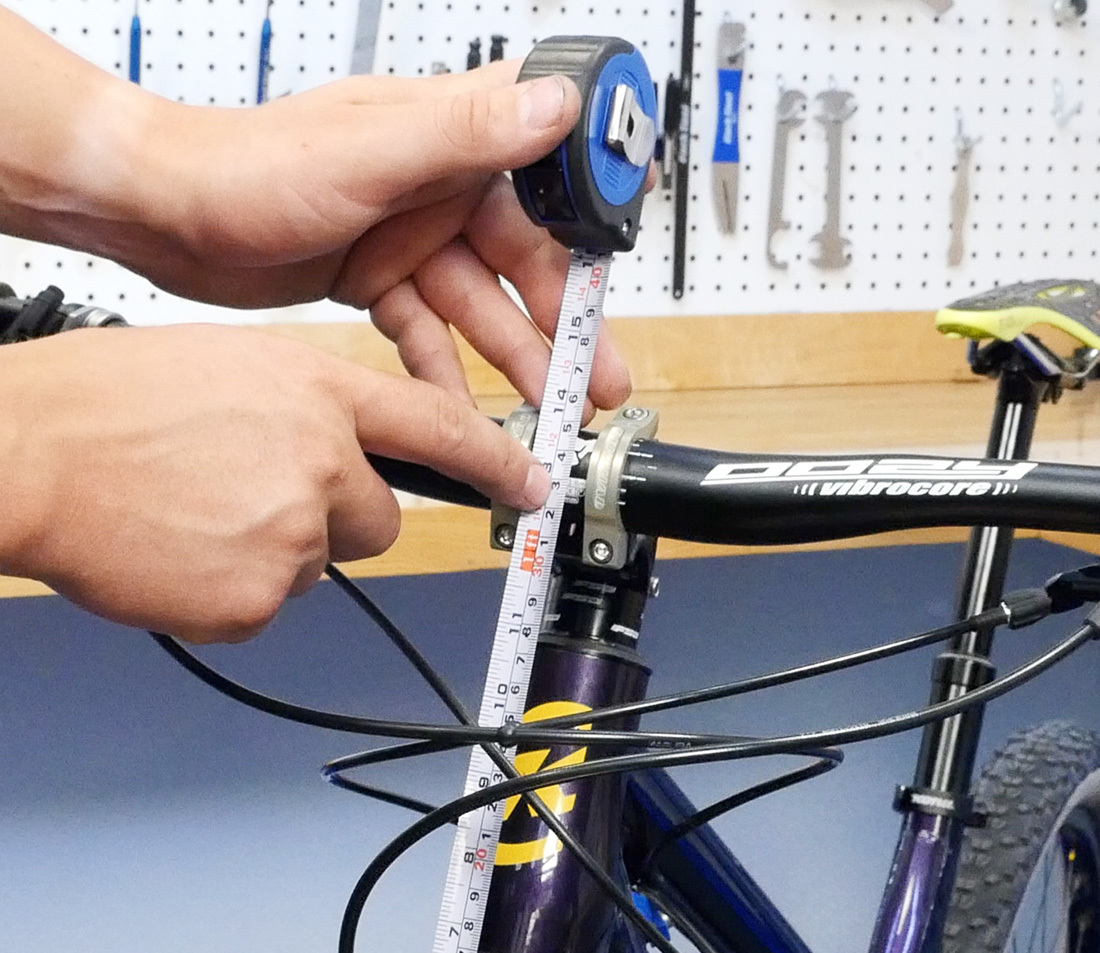
When installing a new stalk information technology is important to pay attention to the height of the stem and the amount of spacers that you were running before. If yous'd like to match the height of the original stalk, mensurate from the elevation of the tire to the centre of the handlebars and write it downward for later reference. Note that a new stem may have a shorter or taller stack, which y'all will then demand to account for with more, fewer, or unlike spacers.
Steering column spacers can exist moved above or beneath the stem to change bar height.
This procedure can be washed with the bike in a repair stand with the forepart wheel removed, or on the ground. It tin be helpful to straddle the bike for stability.
2
Stalk Removal
Begin by removing the one-time stem. Remove the faceplate bolts while holding the faceplate in place.
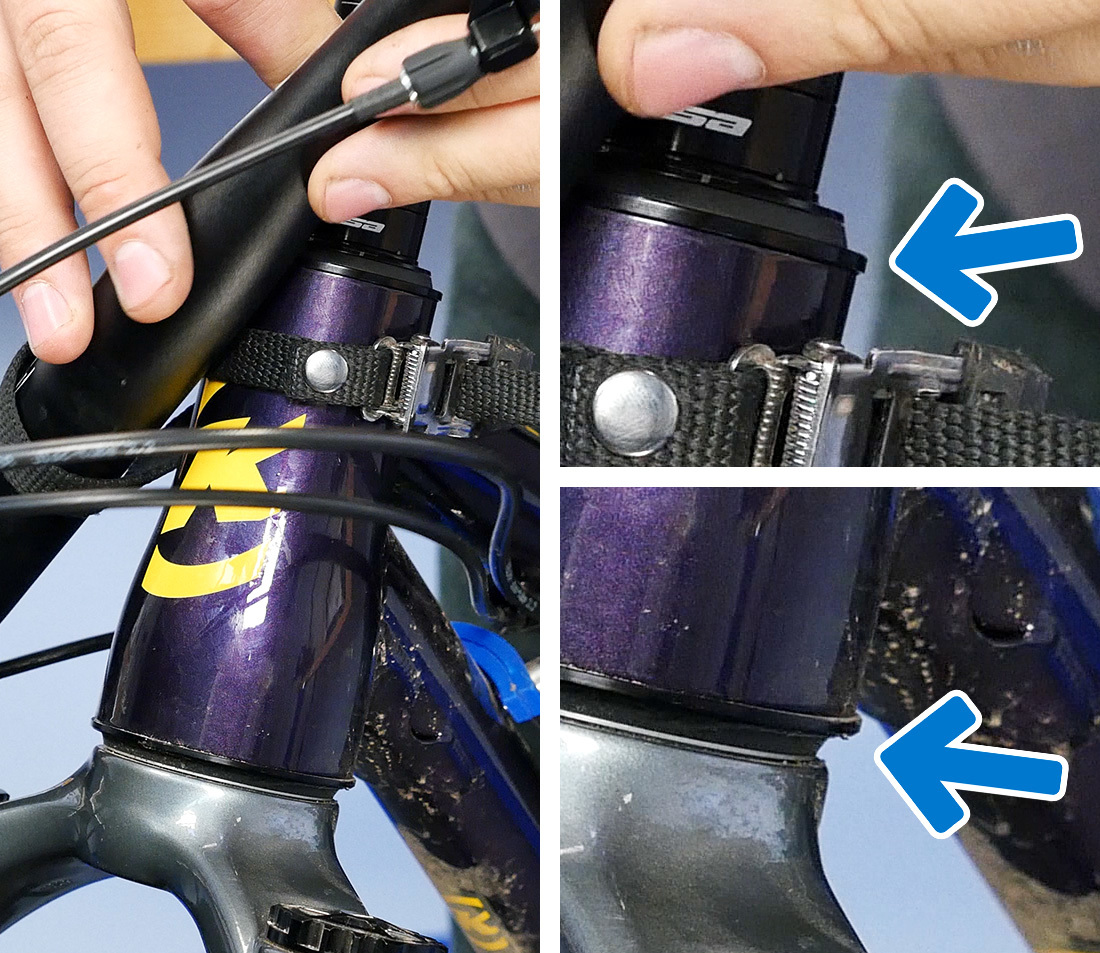
In one case you have the faceplate off, the bars volition be hanging free. It is good do to use a toe strap or something similar to suspend the bars and go on the cable and housing from kinking.

Loosen the pinch bolts at the steerer tube. I full turn is more than likely plenty.
Next we will remove the top cap, only before we exercise: annotation that information technology is currently the only thing keeping the fork from falling out of the bike. If you lot are working on the bike in a repair stand, use some other toe strap or zip tie to keep the fork in place.
Loosen both pinch bolts
Second toe strap to go along fork in frame
Now loosen the top cap bolt, and remove the top cap. Yous should then be able to pull the stem gratuitous of the steerer tube.
3
Stem Installation
Install the new stem and spacers. Set the bike on the ground and ensure that all components are fully seated, with no gaps.
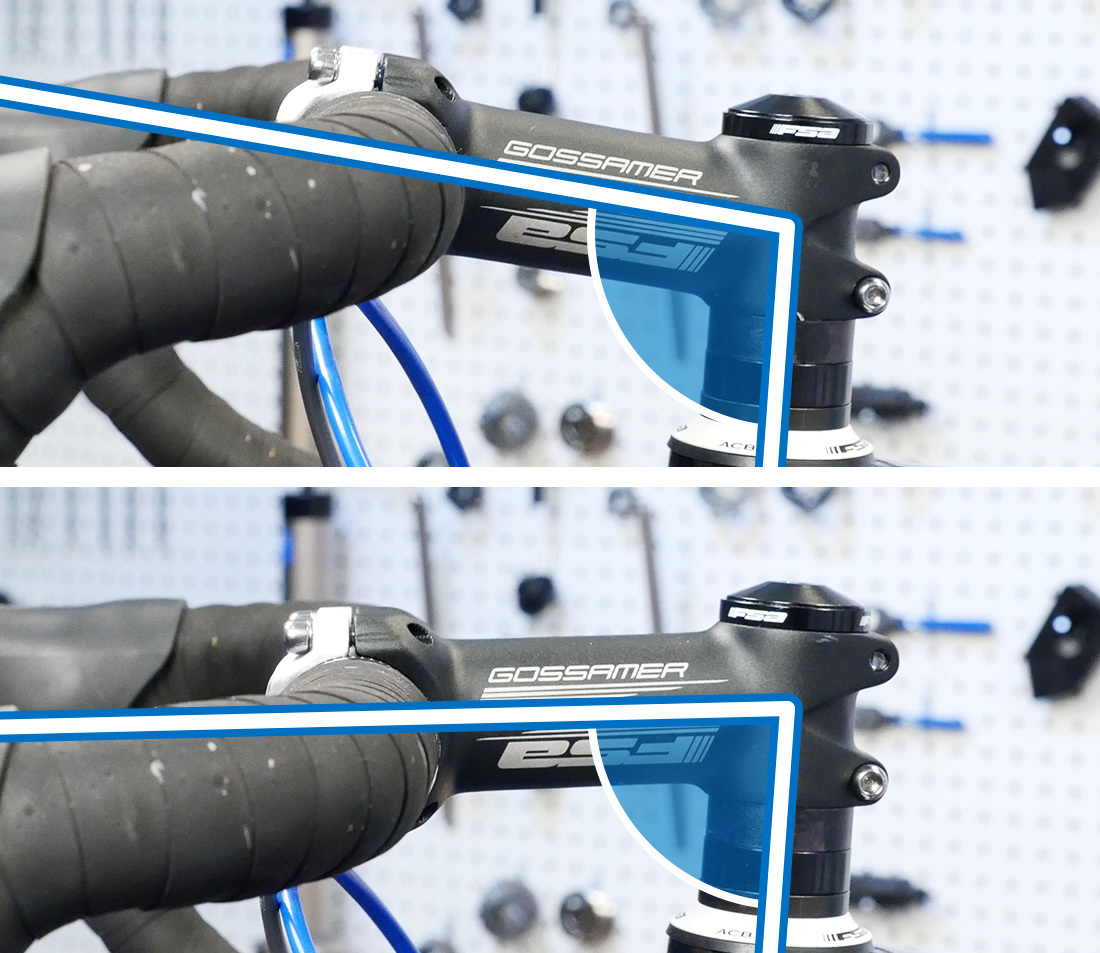
Configure the stem and spacers to the desired stem height. Compare to earlier measurement if so desired. If the new stem has a different stack height than the sometime ane, you will need to rearrange spacers accordingly.
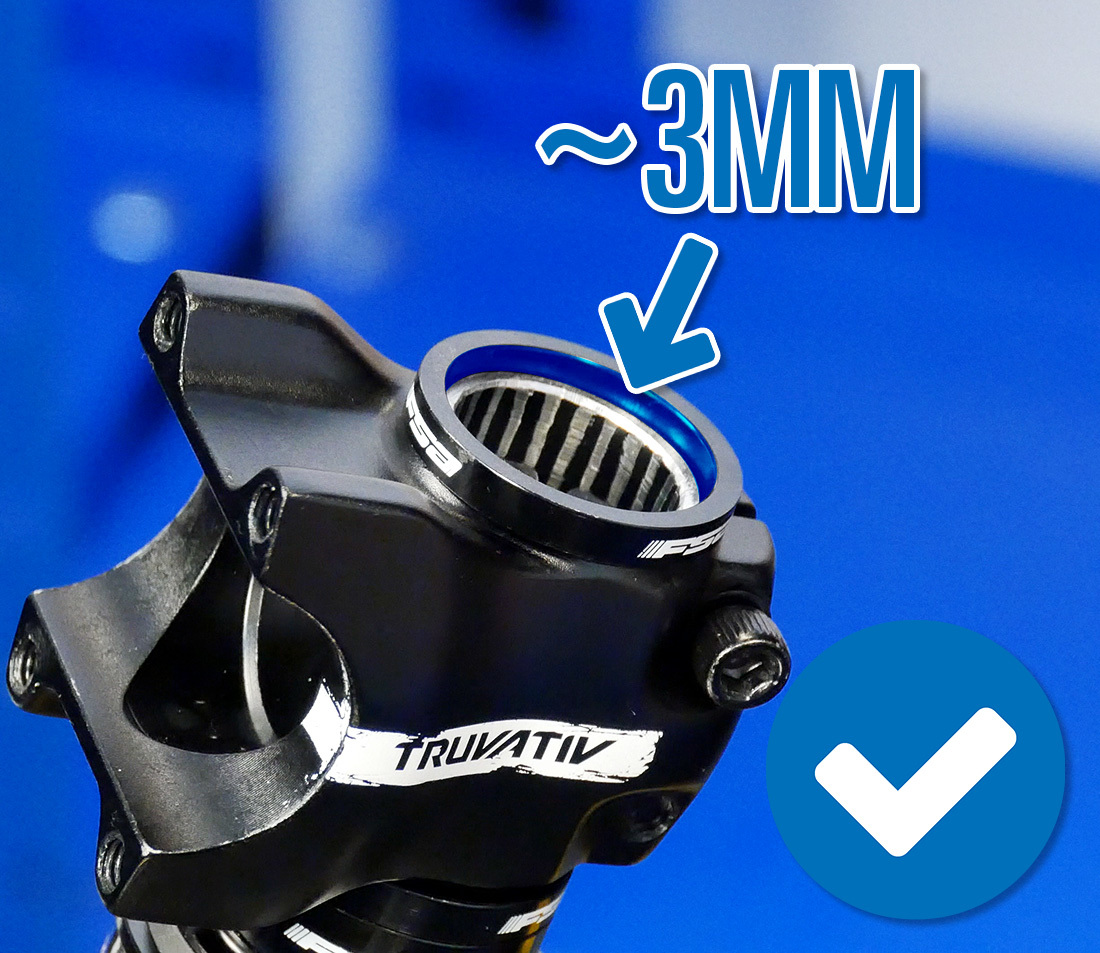
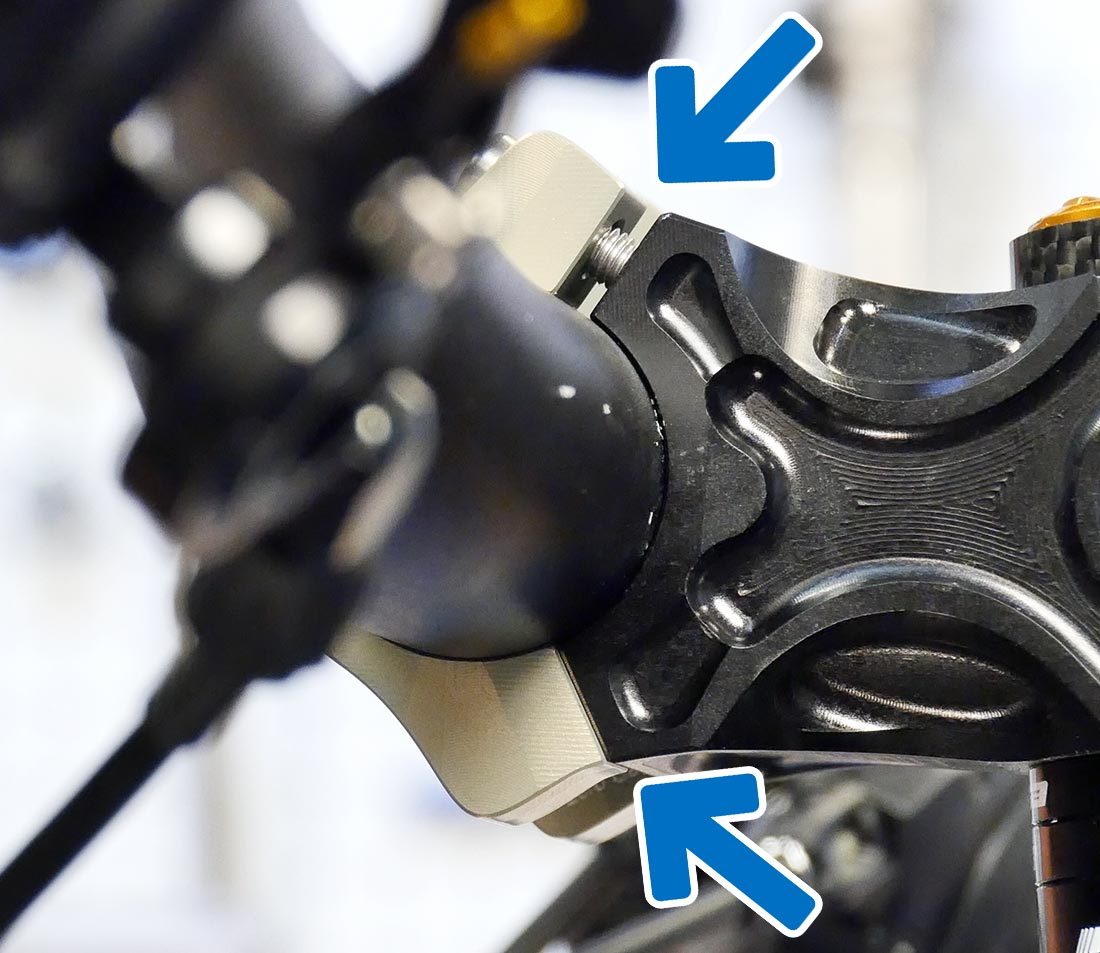
The stalk or spacers should be slightly to a higher place the top of the steerer tube (approximately 3mm). If they are flush with or below the steerer tube, headset aligning will be impossible. Acquire boosted or differently-sized spacers to reach the appropriate meridian. It is also possible that the new stem is taller which may require you lot to remove a spacer.
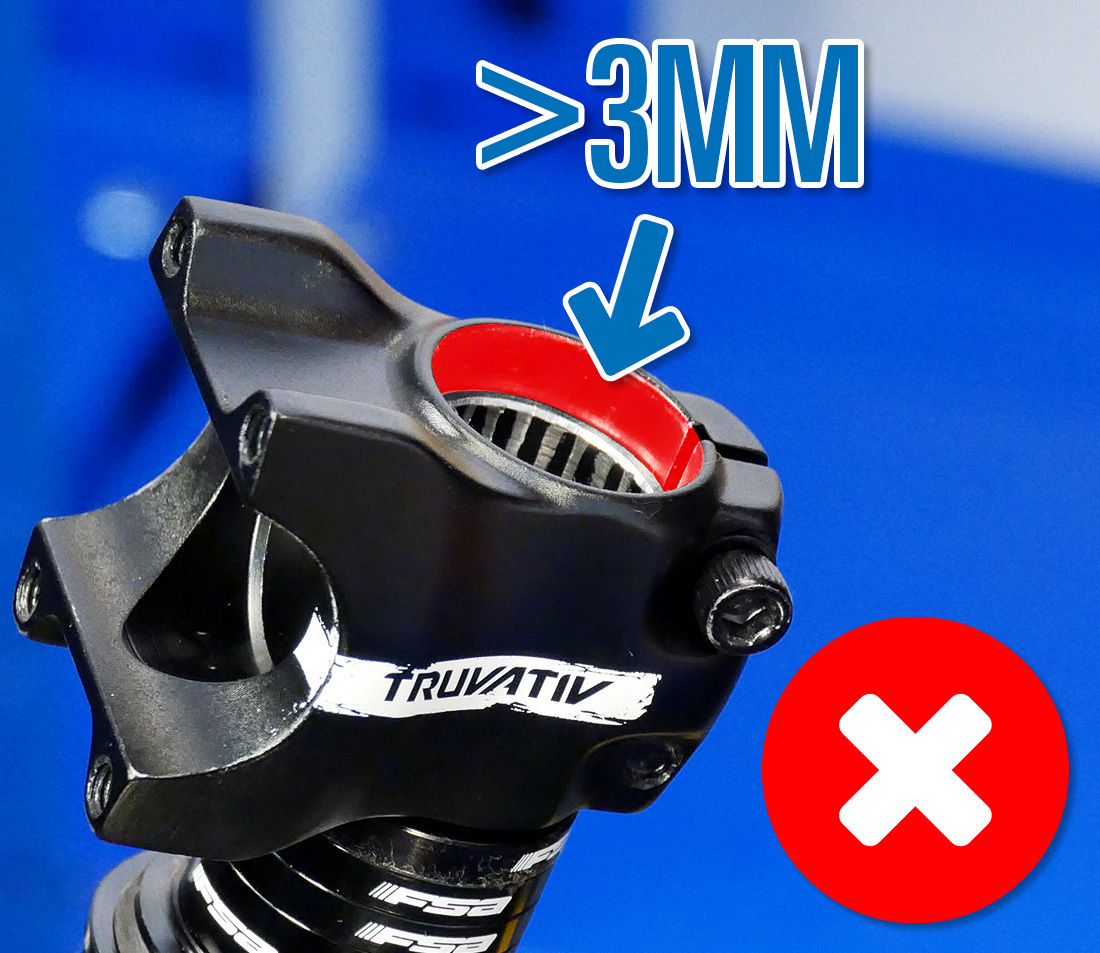
Stack is too loftier — remove spacers
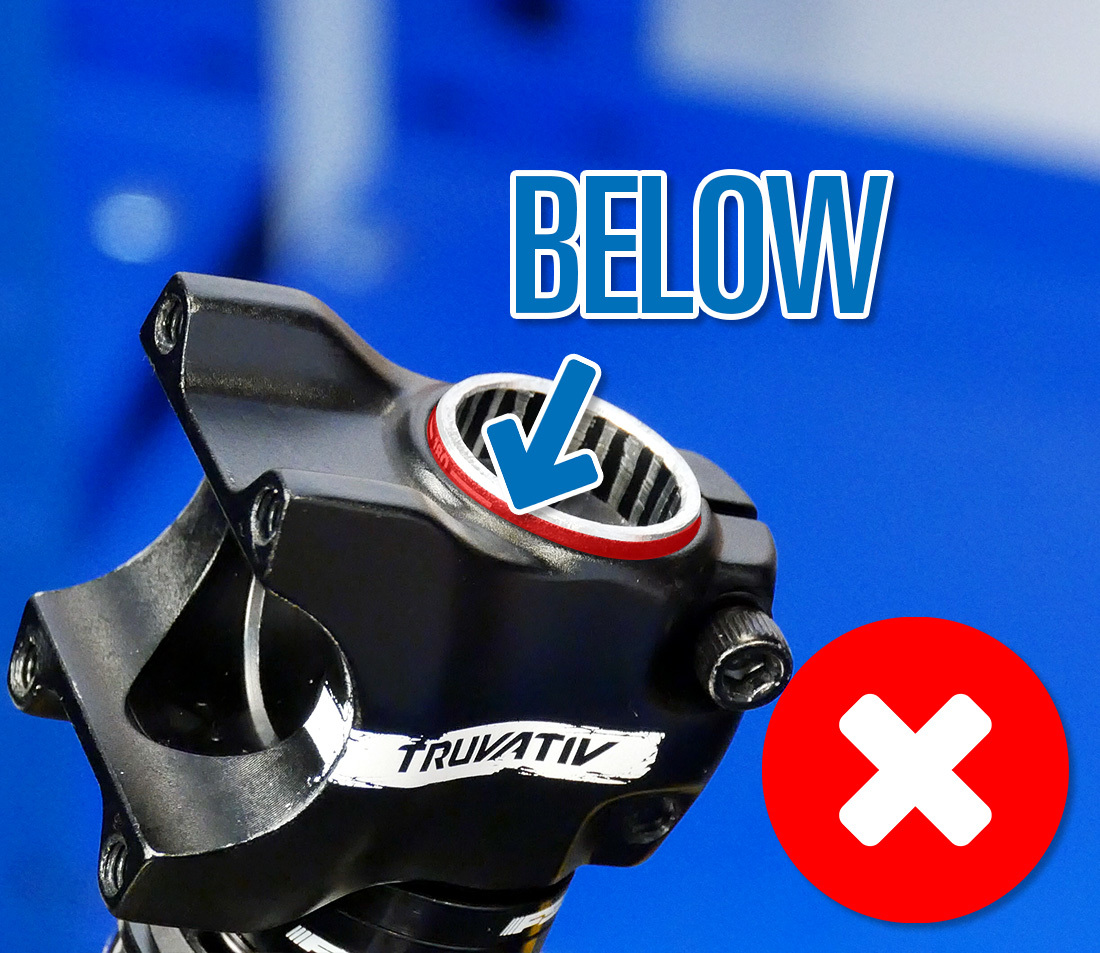
Stack is likewise low — add spacers
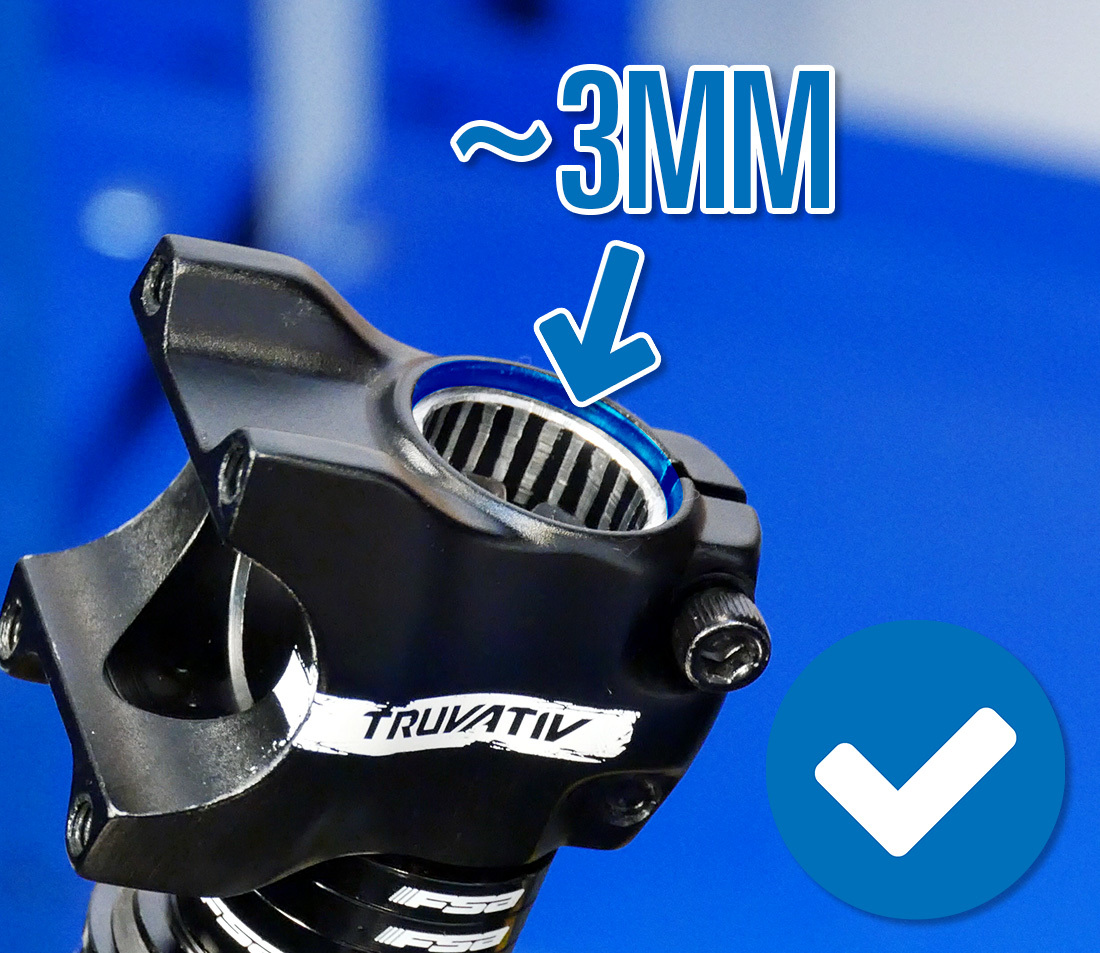
Proper spacer setup with stem on acme of stack
Proper spacer setup with spacer on peak of stack
When dealing with a carbon steerer tube, it is disquisitional to have the steerer tube go all the way through the stem, in society to reduce stress on the end of the steerer tube. Information technology is then necessary to have a spacer on peak of the stem.

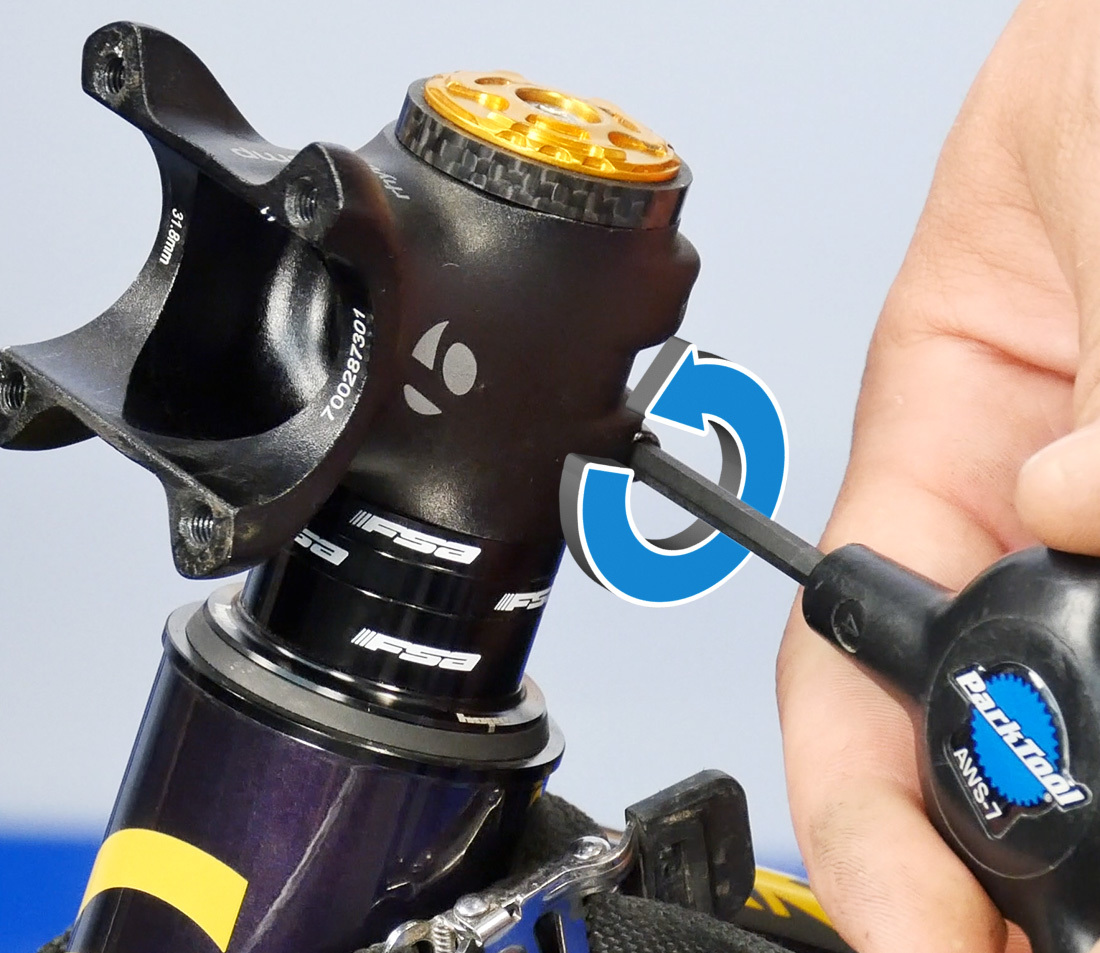
Apply grease to the meridian cap bolt and install the peak cap. The top cap sets the headset adjustment. Slightly snug this bolt for now — we volition fine-melody this aligning almost the end of the process.
If you are installing a carbon bar, it is wise to apply an assembly compound such as Park Tool SAC-two where the bar meets the stem. This will aid create the needed friction between the bar and the stem to resist rotation. It will also deed equally a barrier between the bar and stem materials.
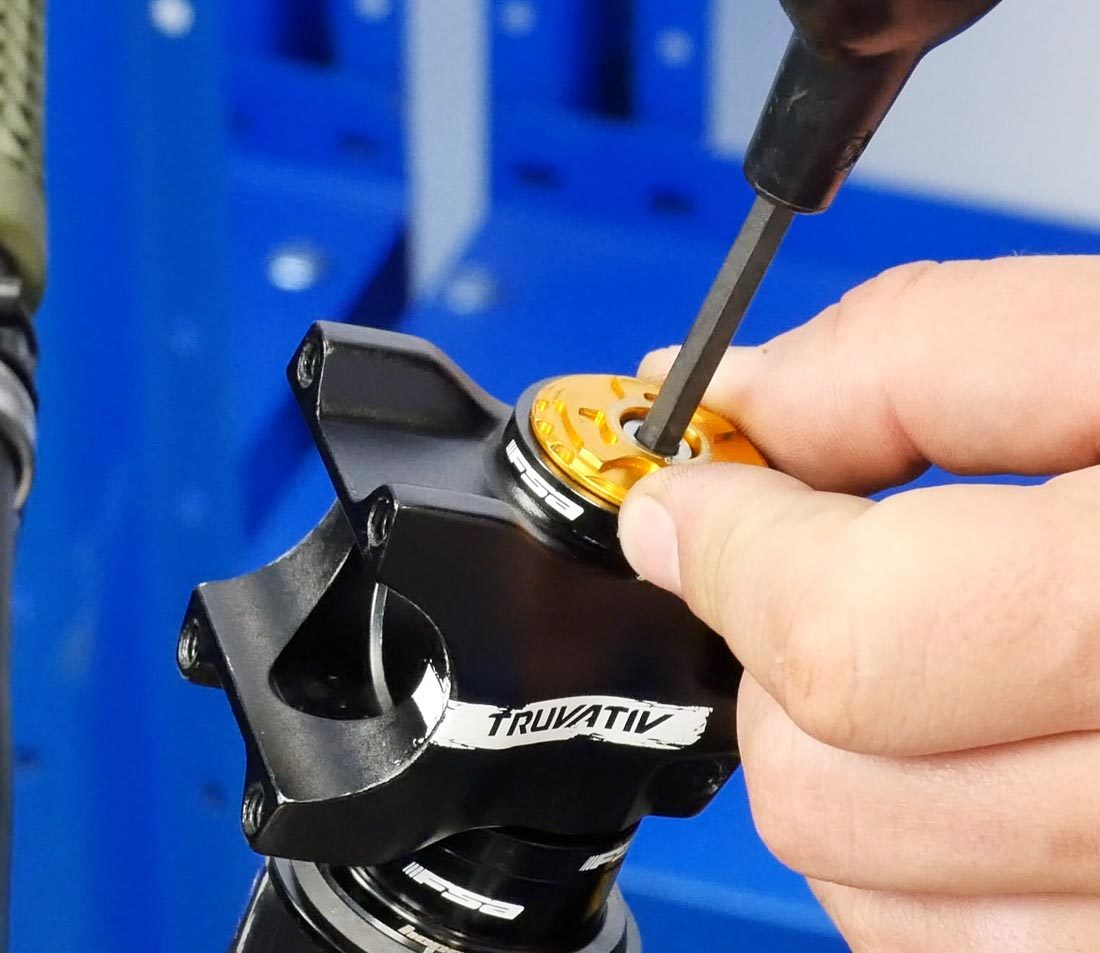
Tighten the superlative cap until yous meet resistance
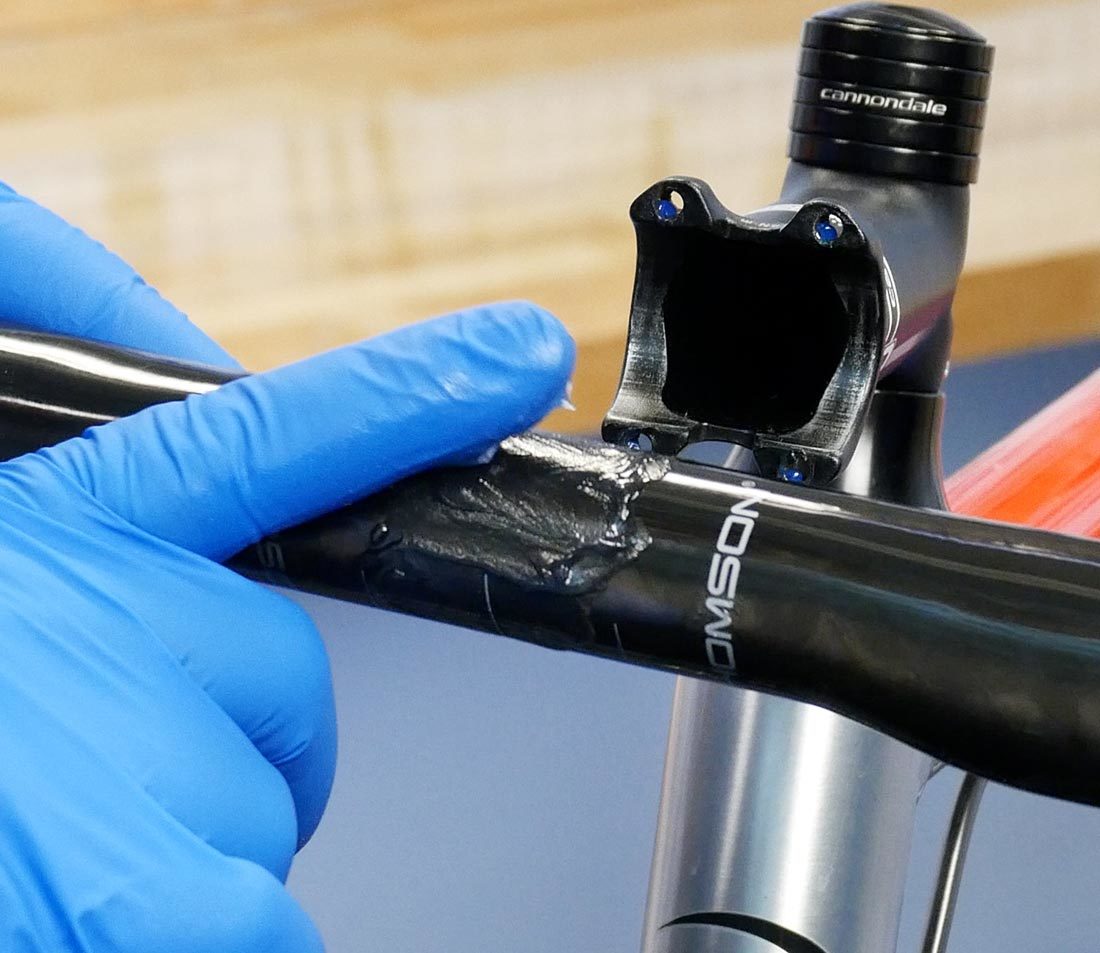
Spread the assembly compound over the area that is covered past the stalk
Apply grease or threadlocker to the faceplate bolts. Place the faceplate over the forepart of the bars and thread in the bolts, but do not tighten them fully.
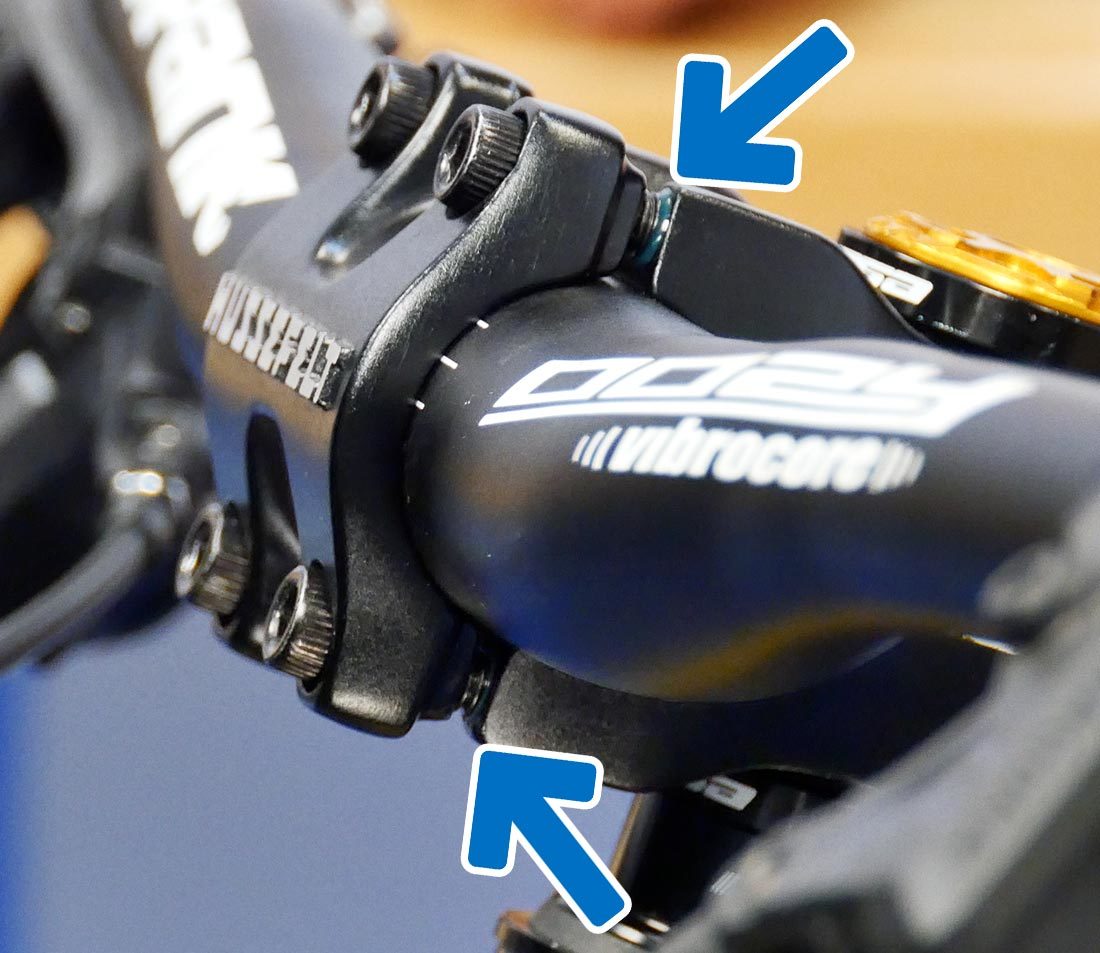
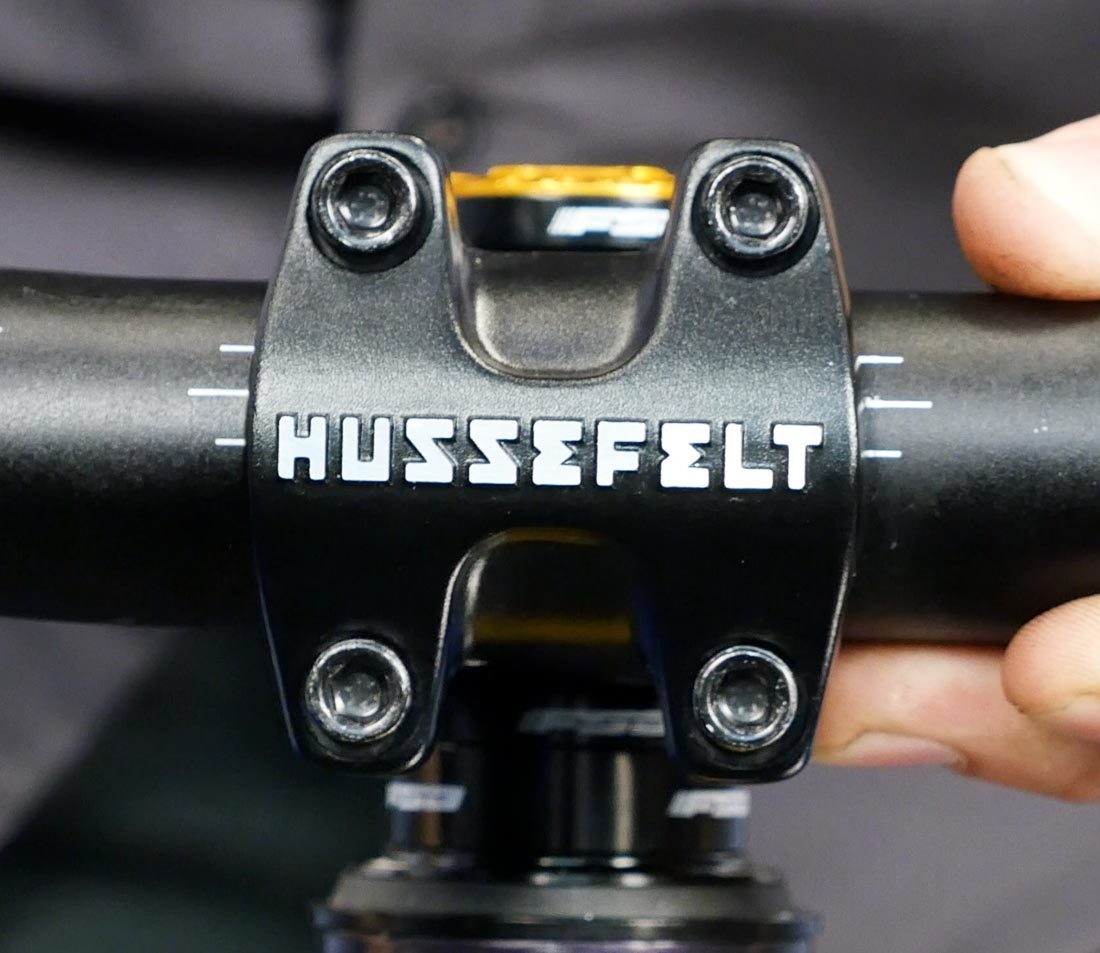
These bolts should be tightened evenly and the gap between the stem and the face plate should typically be even on the top and bottom. This reduces stress on the bolt heads.
In that location are a few stalk designs that require that the peak or lesser bolts to be fully tightened before the other side. This manner of stalk is often labeled accordingly. Inquire with the manufacturer for more info.
Typical stem designs require fifty-fifty threading of the faceplate bolts
Some designs require the top or lesser to be threaded in completely
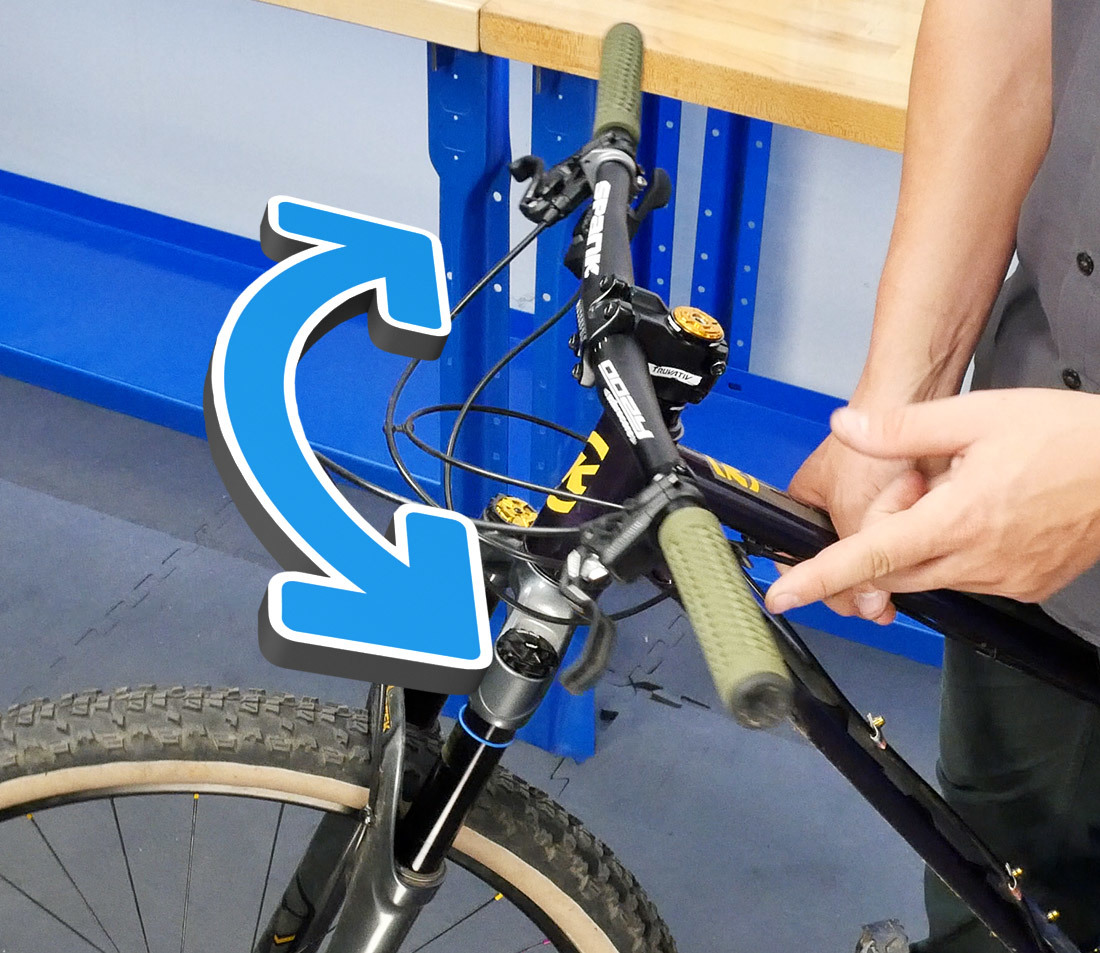
Before fully tightening the bolts, stand over the bicycle to gear up the bar scroll to your preference. You will also want to make sure the bars are centered in the stem at this point.
Fully tighten and torque the face plate bolts in an Ten blueprint. A typical torque spec is 4–6Nm.
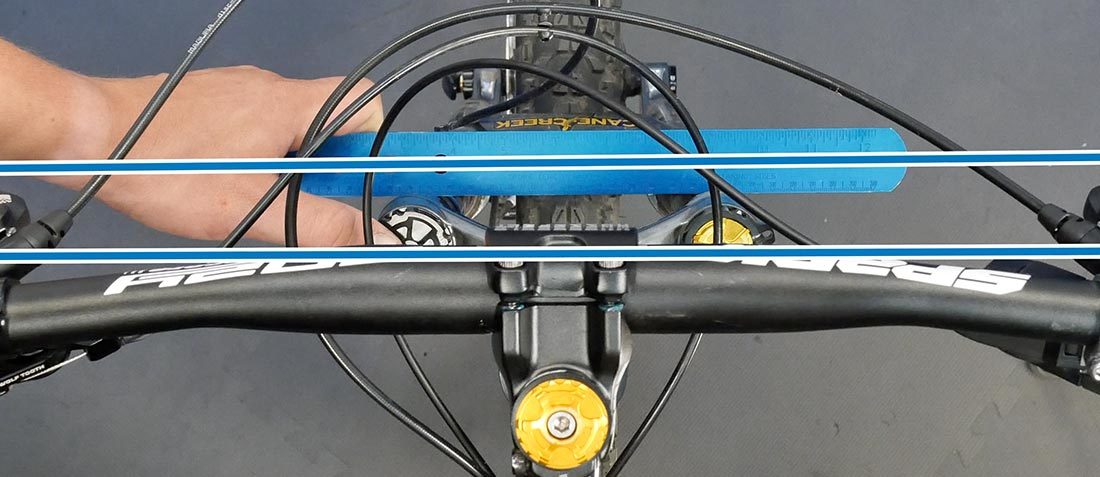
Many confined have markings to aid in centering

Tighten and torque in an "X" pattern
Snug the top cap down until at that place is slight resistance. Test the headset adjustment past lifting the bike and pushing the bars back and forth — the bars should turn freely with very piffling resistance. If the motion of the bars feels sticky or hesitant, loosen the top cap i/8th of a plough and examination again.
Side by side, straighten the handlebars. It tin be helpful to utilize a ruler or other long object against the fork legs every bit a reference betoken.
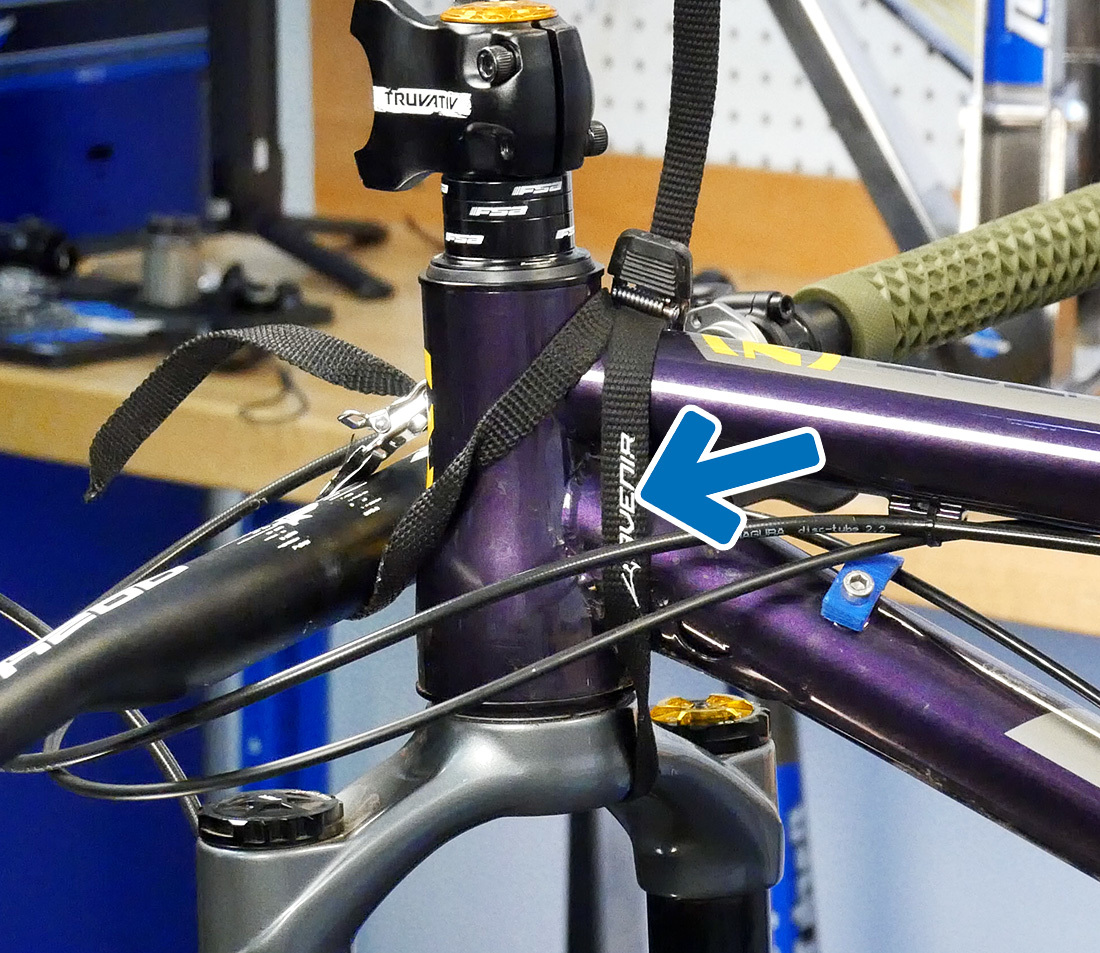
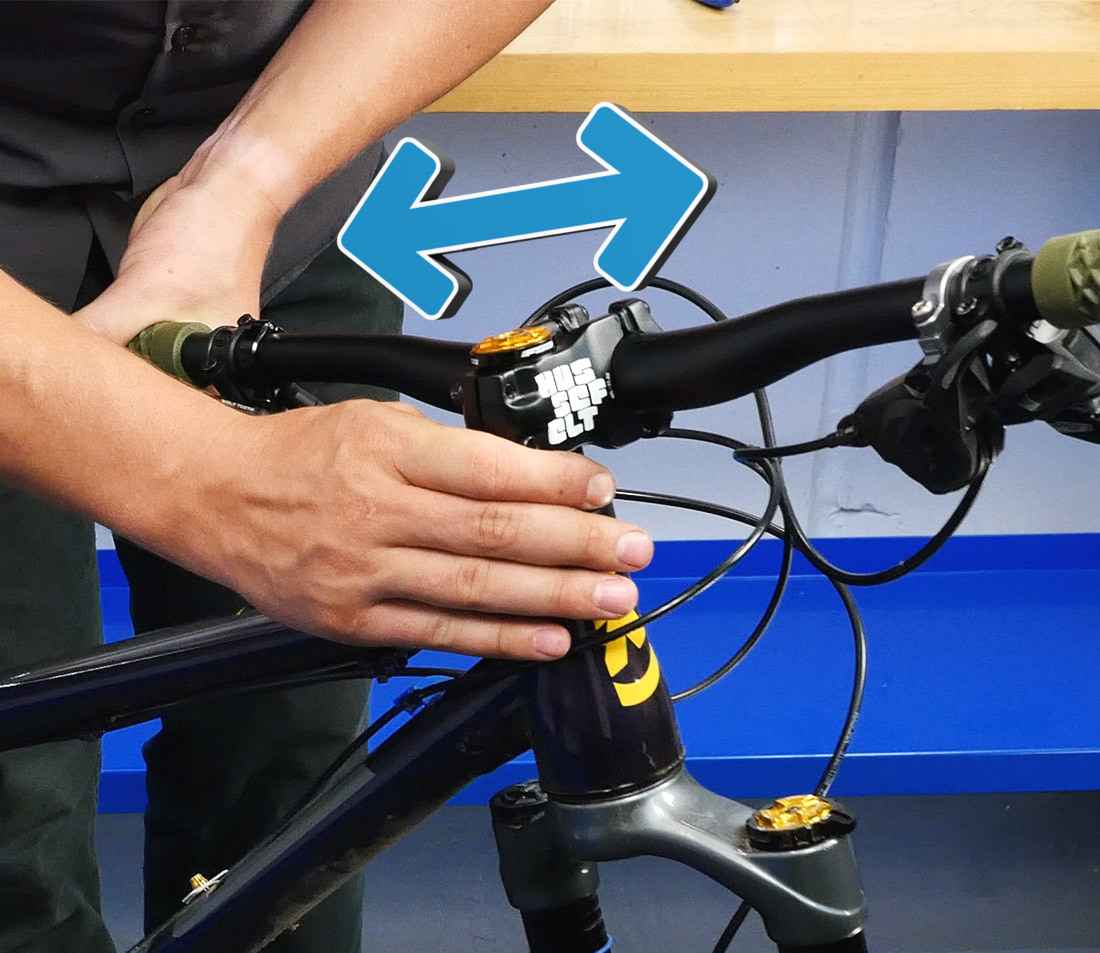
Snug the pinch bolts. Test the headset adjustment by holding the front restriction firmly and rock the bike back and along. Put your fingers on the top bearing cover of the headset and the meridian cup of the headset and feel for play, which can exist felt as a slight knock. It may also help to plough the handlebars 90 degrees — this isolates fork play.
If you feel play, loosen the pinch bolts, tighten the meridian cap another ane/8th plow, re-tighten the pinch bolts, and check over again. continue until the play is gone. Verify that the bars still turn freely with little resistance.
Torque the compression bolts. A typical torque spec is 4–six Nm.

Source: https://www.parktool.com/blog/repair-help/stem-removal-installation-threadless
Posted by: eldredapocran.blogspot.com
0 Response to "How To Install Bmx Stem"
Post a Comment